
Pennywise The Clown Makeup Tutorial
17th Oct 2017
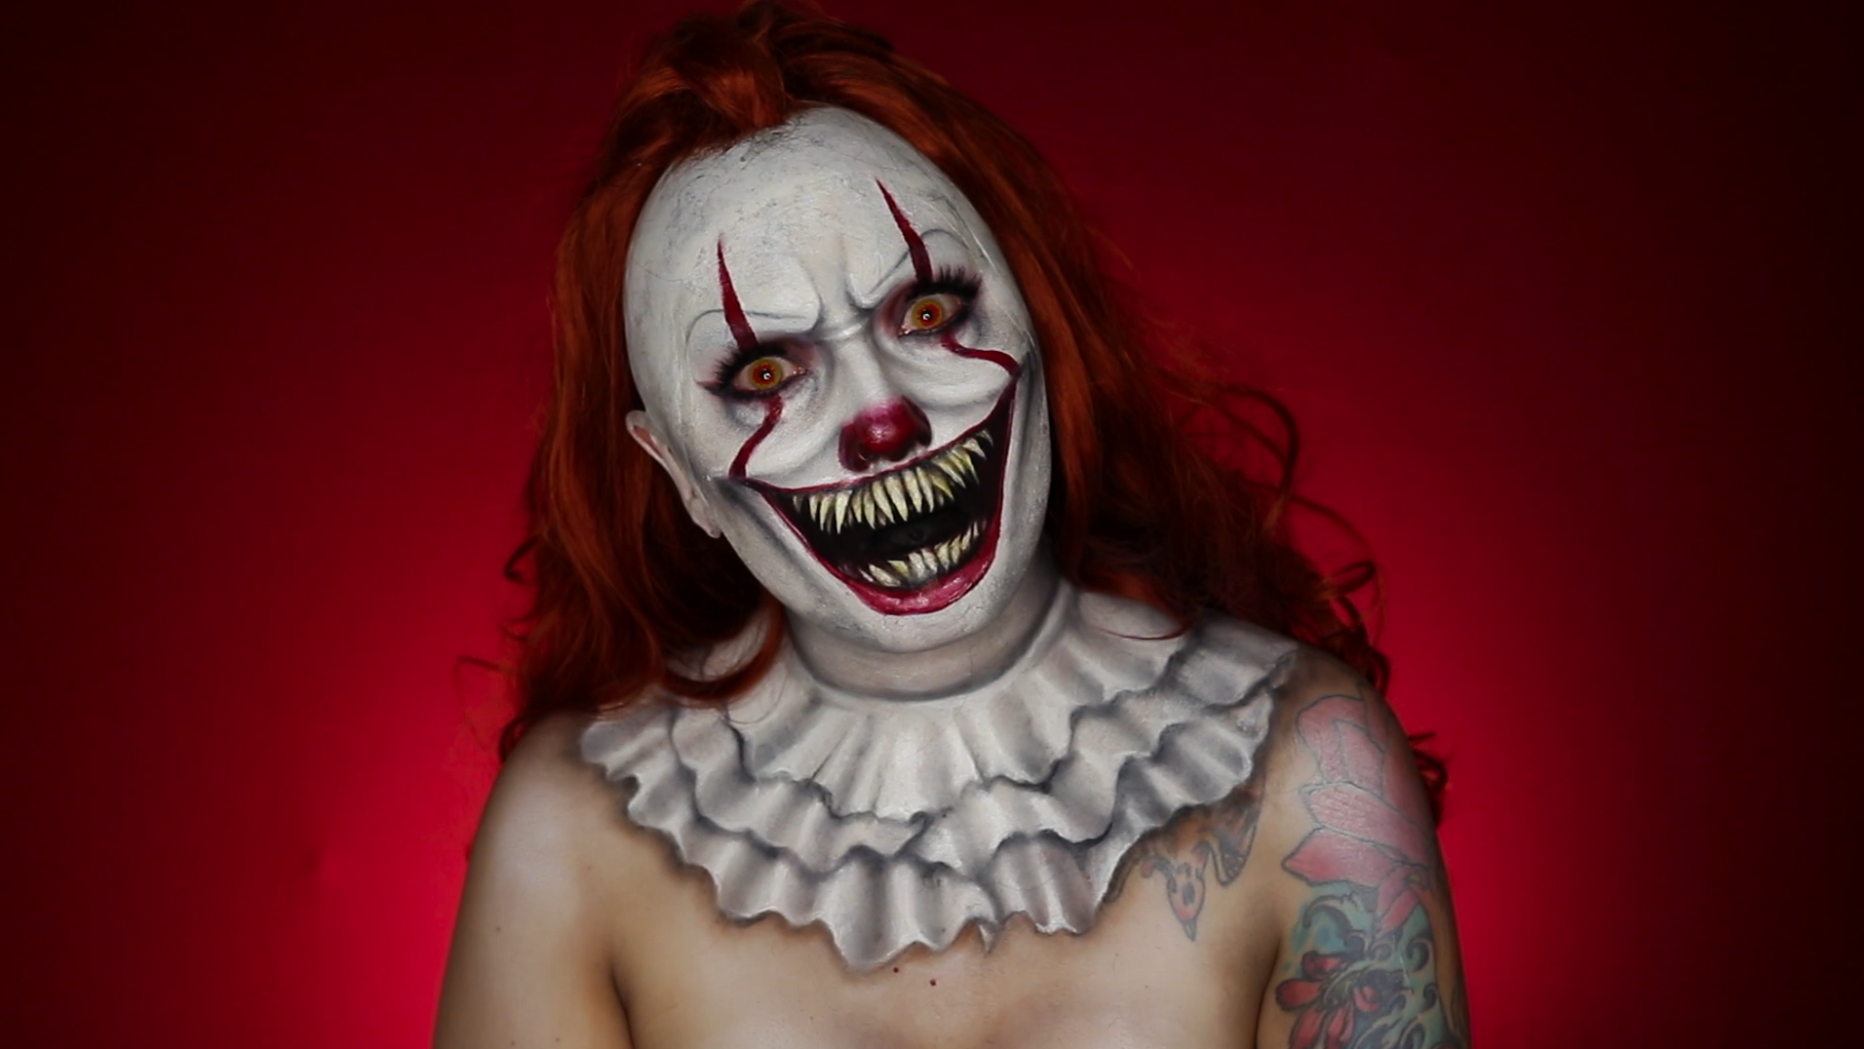
Hey IT fans, here is the perfect Halloween costume idea for you - Pennywise the Clown. With this version by Jordan Hanz you better make sure you stay away from storm drains or you'll float too!
The Mehron team has partnered with Jordan to help you gear up for the spookiest of holidays with a popular character from the biggest horror movie of the year. Pennywise has been a cult favorite since the 1990 version of the Stephen King book hit the screen. Just follow these steps from Jordan, which she demonstrates in her video below, to recreate the look. You can find all the products you need to transform yourself into Pennywise on Jordan's custom Mehron storefont on Amazon.
- Start by putting on Mehron's Latex Bald Cap. Cut as needed to fit your head, and adhere with Spirit Gum.
- Map out the mouth with a pencil.
- Using a flat brush, apply Clown White in a stippling motion all over the face - being particularly careful around the mouth you just drew - and the head. Bring the white down onto the neck and chest as well.
- Set the Clown White with Mehron Ultra Fine Setting Powder.
- Using a very light hand, hollow out and add dimension to the face using the grey and brown tones in the Earth iNtense Pro Pressed Pigment Powder Palette. Draw out the smile lines and add a tone of shadow underneath to give the appearance of the skin pulling up.
- Apply Red Earth from the iNtense palette to the eye lids and along the bottom of the eye, blending out. Keep the application patchy so that it looks distressed. Add some black (Carbon) iNtense to the outer corners and keep darkening as you go.
- Since Jordan made this her own version of Pennywise, she added a fun winged liner by dipping her brush into water and then into the Carbon iNtense Pro. Use the Carbon to also create some angry brow lines.
- With the Graphite (Grey) iNtense Pro, draw on the brows.
- Use the iNtense palette to dirty up the top of the head and face for a textured look.
- Now, the mouth! Mix White and Yellow Paradise Makeup AQ and use the blended color to draw the teeth. Start with the bottom teeth, then work your way up to the top teeth. Be careful not to draw over the top lip line.
- Outline the lips with Red Paradise Makeup AQ. Draw a thin upper lip and a thick lower lip. Then darken the outer corners of the mouth with Black Paradise Makeup AQ.
- Use the Red Paradise Makeup AQ to draw the red lines from above the eyebrows down to the mouth. Try to keep the lines as symmetrical as you can.
- Paint on the red nose and blend upwards with a fluffy brush to soften the edge. Darken the base of the nose with the Black Paradise Makeup AQ.
- Next, define the teeth. With a very small brush, go in between the teeth you have already drawn and start shaping with a mixture of Black and Red Paradise Makeup AQ. Then shade the teeth with Desert Sand (Light Brown) and Carbon (Black) from the iNtense Earth palette to create a shadow. Add some highlights to the more forward teeth with White Paradise Makeup AQ.
- Add a wrinkle near the mouth using the shades in the iNtense Earth palette.
- Now on to the chest. Use Graphite and Carbon from the iNtense Earth palette shadows to sketch out the ruffles and create shadows. Add shadows underneath ruffles that are layering below other ruffles. Highlight where the top of the fabric ruffles will be with White Paradise Makeup AQ. Along the edge of the last ruffle, add some Carbon and Desert Sand iNtense Pro to make it look like the ruffle is on top of the skin.
- Finish up with some White Paradise Makeup AQ highlights to the mouth and nose, apply the wig toward the back of the head, and add some mascara and lashes, along with some contacts to complete the look.